- RetroScan-HD Universal View/Export Functions -
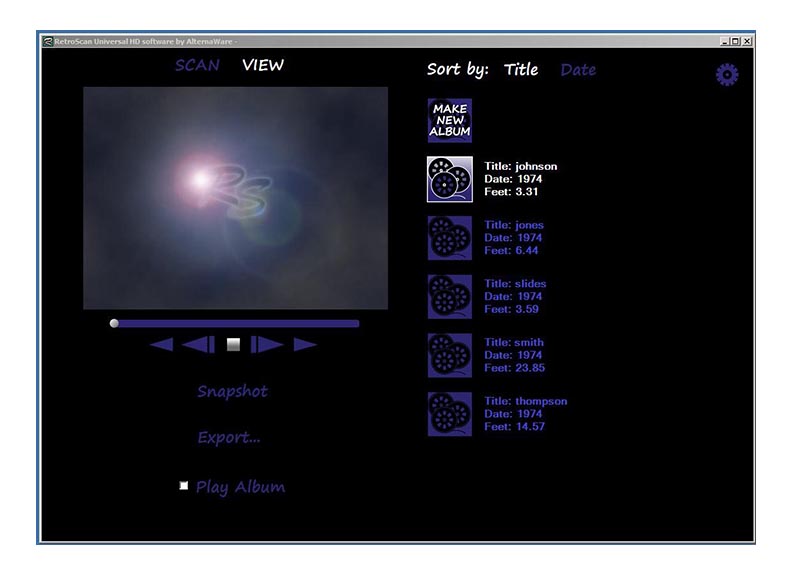
Click on "View" at the top of the software, and the screen will change to this:
If you click on "Export", you will find this screen.It should be noted that the Universal does not scan to a video file, which can degrade quality. Instead, the RetroScan software scans to a series of individual still frames in a proprietary folder. These stills are stored in such a way that you can play them back rapidly enough to see motion.
To view a file, open an album and click on a file to load it into the player. The playback controls under the window are traditional with a scroll bar. Pressing "Snapshot" will produce a single 1080 resolution still of the frame visible on screen. Snapshot can be used when the film is being played as well. All snapshots will be found in the "Export" folder on your chosen export drive. "Play Album" will play the entire contents of any album that has been opened.
- EXPORT FUNCTIONS -
To edit any of these captured files, you must first export them to a format that is compatible with your preferred edit program for your PC or Mac.

Note that each folder displays the destination drive for exports. If you wish to change the export drive of any given album, just close out this screen, change the drive selection in the album in question (right click on the album to open it), then return to the export screen.
Home movies and other films are often shot at a variety of frame rates, such as 16fps for Regular 8, 18fps for Super 8 and 24fps for 16mm. Also, some people might want their films to be exported as standard defintion (SD) or high def (HD). Others might want their films to be exported as a numbered image sequence where each frame of film is maintained on an individual still frame. Numbered image sequences offer the absolute highest quality because the video file is created by your computer in whatever codec is unique to your edit system. Not all edit systems can import numbered image sequences so check with your systems user's manual for directions on use of numbered image sequences. If editing on a Mac, you may need to import the images via QuickTime Pro.
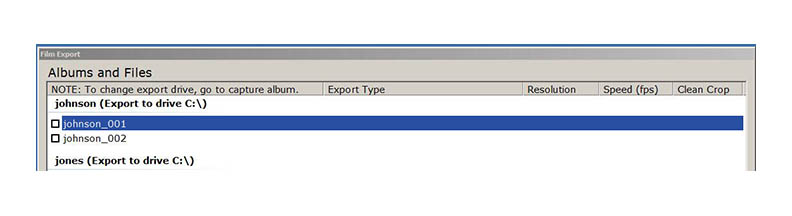
To apply speeds, resolutions and formats, just click on a file to select it.

Left click on the selected file directly under the "Export Type" column .
Use the drop down boxes to choose the type of output you want.
Do the same for "Resolution", "Speed" and "Clean Crop".
Note: NTSC is the SD format for North America and Japan.
PAL is the SD format for the UK and Europe.
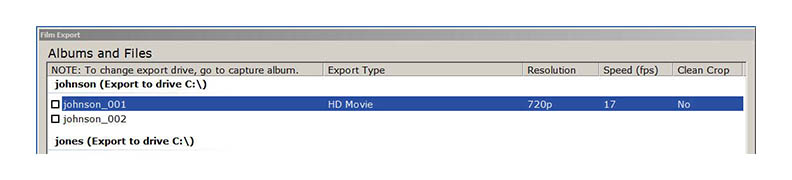
In this example, the file will be output as a 720p HD movie at 17fps. The "Clean Crop" function seen to the right is handy if you review your transfer and suddenly find that you have images with hair or debris on the edges, or possibly a visible frame line near the top or bottom, and don't want to rescan the film again. Changing Clean Crop to "Yes" will perform a gentle 10% crop into the image and resize it back to the desired resolution, thus leaving out the offending debris on the edges of the frame. The resizing is close to perfect so no degradation of the image will be noticeable.

Once you have made all your choices, check the box of each file that you wish to export. Any file not checked will be left out of that export. All exported files will be found in the Export folder of your export drive. Just click the "EXPORT" button at the bottom to start your export.

You can have the software automatically shut down the PC after it completes export by checking the shut down box. This will help save wear on your PC.
If you have any questions, please feel free to email at
retrofix@swtexas.net or call us at 830-966-4664.
Click HERE to go back to RetroScan-HD Universal Instructions.
All information and imagery copyright 2016 MovieStuff, LLC
All right reserved.