- RetroScan-HD Universal Scan Functions -
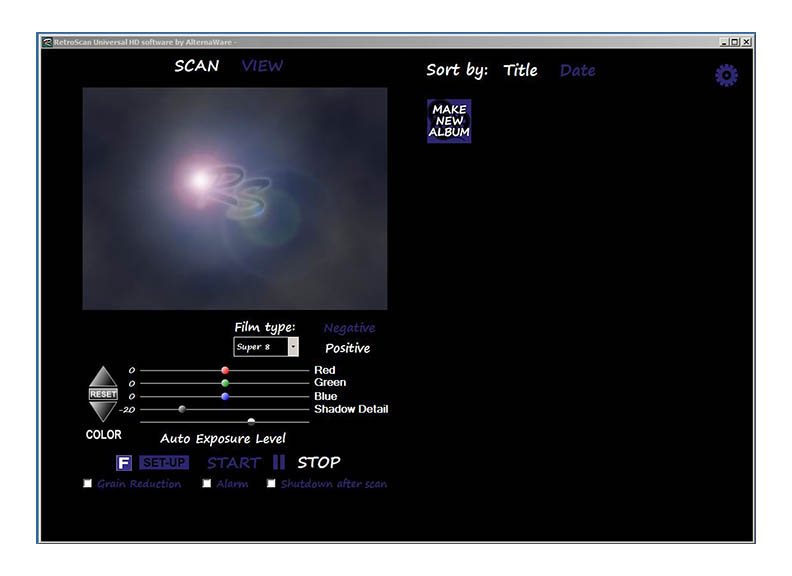
Once you launch the software, the first screen you will see is this.
If this is the first launch during installation, it is advised to wait a few minutes for drivers and background processes to complete before attempting to perform your first scan. The default mode of the software is Auto Exposure. This can be changed to Manual Exposure easily via the settings panel of the software.
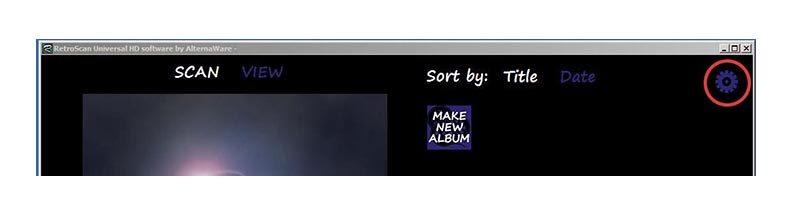
To access settings, just click on the settings icon in the upper right hand corner. It is suggested that you continue reading the scan functions below to familiarize yourself with the various functions before making changes to the software settings.

These controls let you toggle between the scanning function and the viewing function. "Scan" is selected to transfer your film and contains various image controls and functions. "View" is selected after scanning to watch or export your films into desired formats.

Use this drop down menu to select the format of the film you are transferring (Super 8, Regular 8, 16mm, etc) NOTE: If you choose the wrong format, you will not hurt anything and the film will still capture but the footage will not calculate properly in the software.
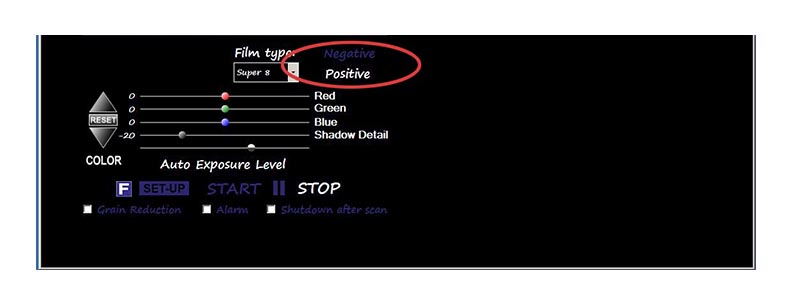
You will find that old home movies are always "Positive", which is the default state for the software. "Negative" should be selected when transferring modern color negative.
NOTE: If transferring black and white neg, it is advised to select "Positive" and then invert the negative image to positive in your computer edit program. This is because the color neg function of the software has a gamma adjustment applied that is not desirable for black and white negative.
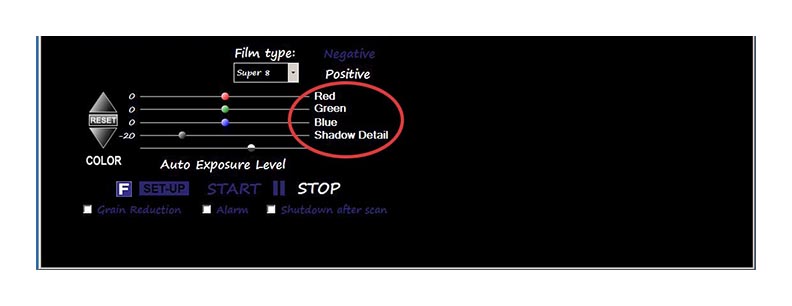
The Red-Green-Blue sliders control the color of your image and can be changed before or during capture. Shadow Detail is preset to -20 for powerful blacks and good contrast but can be adjusted at any time to bring out more information in shadow areas if required.
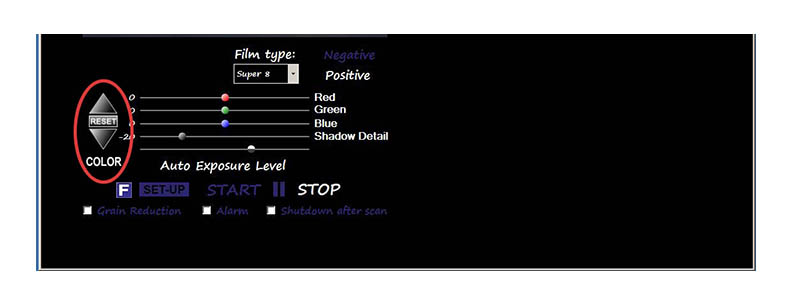
The up and down keys to the left move all RGB sliders together. "RESET" brings all RGB sliders back to center. This action does not reset the Auto Exposure level nor the Shadow Detail level.
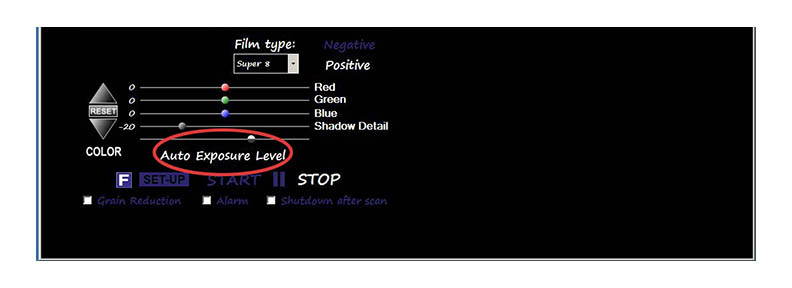
Note the default position of the Auto Exposure slider, which is between "Exposure" and "Level". Combined with the default -20 default position of the Shadow Detail slider, this should provide bright, snappy transfers of most home movies that vary in exposure from slightly under to slightly over exposed. The Auto Exposure Level can be adjusted as needed to accommodate a wide variety of color or black and white film.
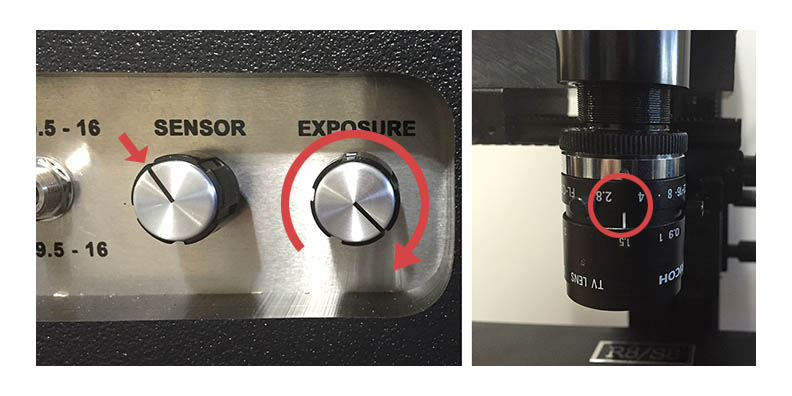
For using the auto exposure function on typical home movies, turn the exposure knob to full brightness. Make sure that the lens is set to between f2.8 and f4. The normal starting point for the sensor is about 11:00, which is a half turn back from full right. Adjust the sensor as needed for smooth transport of the film. (see Universal instructions)
For manual exposure, uncheck the "Auto Exposure" box in the settings.
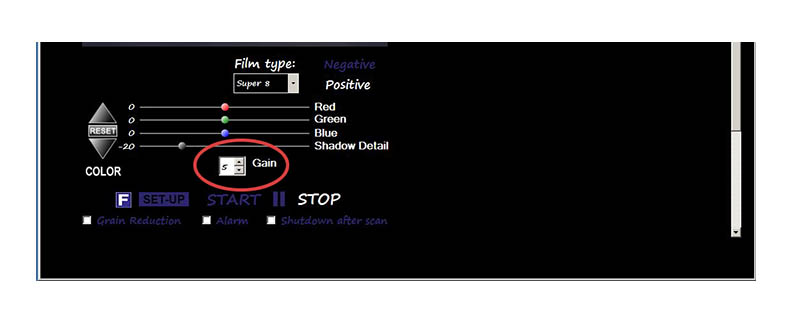
When in manual exposure mode, all exposure adjustments will be made via the exposure control knob on the Universal. You can adjust the sensitivity of the camera by using the Gain drop down menu. You have a choice of 0, 5, 10 and 15 db. The default for manual exposure is 5. The higher the gain, the more "noise" may appear in the image, so this function should be used carefully for best picture quality. This gain level will adjust automatically when Auto Exposure is activated.
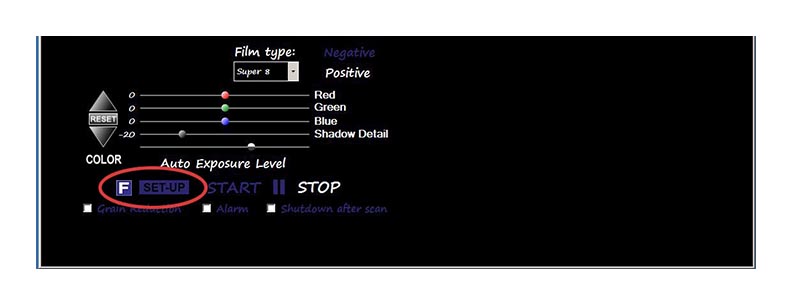
NOTE: No image will appear unless you are running film in the unit.The "Set-Up" button lets you run the scanner and see the image as if you were capturing but without actually writing anything to the hard drive. This will let you preview the image while you make adjustments to color, framing, etc. Click "Set-Up" a second time to end the preview.
If you first press the "F" button to the left and then press "Set-Up", a window will pop up that gives you a magnified view of the film grain for easier focusing. To close the window, press "Set-Up" again and then "F".
Helpful hint: If your PC allows it, set up a second monitor from your PC and expand your desktop to that monitor. Place that monitor up and behind the camera column of the Universal. Drag the Focus pop up window to that monitor and expand it to show the entire frame by pulling on the corners or sides of the window. The Focus window will always appear on the second monitor when you press the F button during set up. This will make fine focusing of the unit easier when setting up reels for transfer. The Focus window is not available during actual transfer, however.
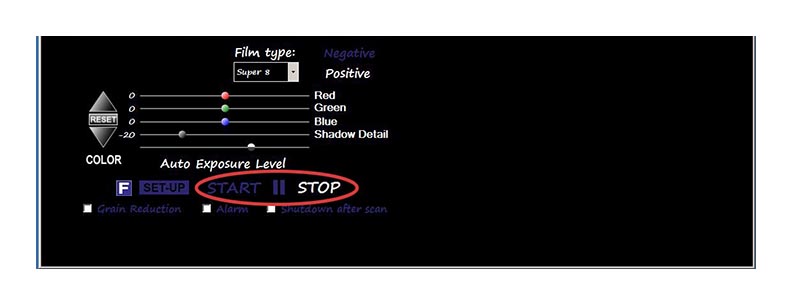
The "Start" button will begin your actual scan and the "Stop" button will end your scan. In between "Start" and "Stop" is a Pause symbol "II", which will let you pause the recording. Press the Pause symbol to pause the recording. Press the Pause symbol again to resume recording.
NOTE: You can not go directly from Pause to "Start" or "Stop". Also, the software Start, Pause and Stop buttons do not control the motor functions of the Universal. So to start a scan, you must first switch the Universal to Forward and then press Start on the software. To end a scan, press Stop on the software and then switch the Universal back to stop.
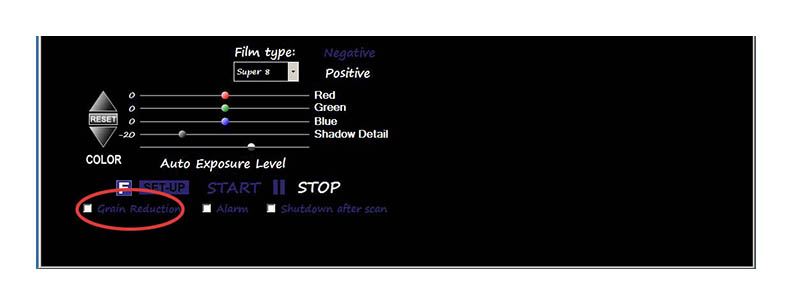
"Grain Reduction" will make the grain of the film less noticeable by reducing the degree of sharpening applied to each frame.
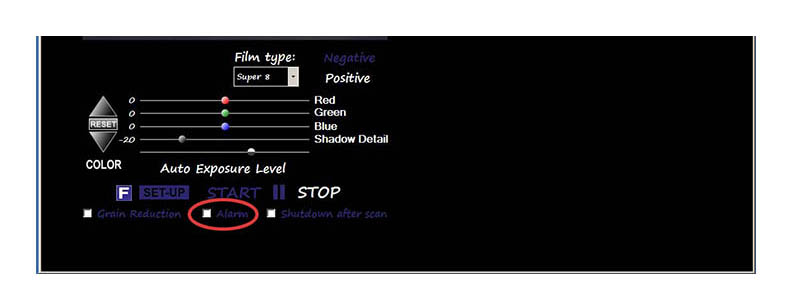
"Alarm" will sound if the capture stops unattended, such as the end of a roll, a jam or a break in the film. The alarm is head from your PC so adjust your speaker volume accordingly.
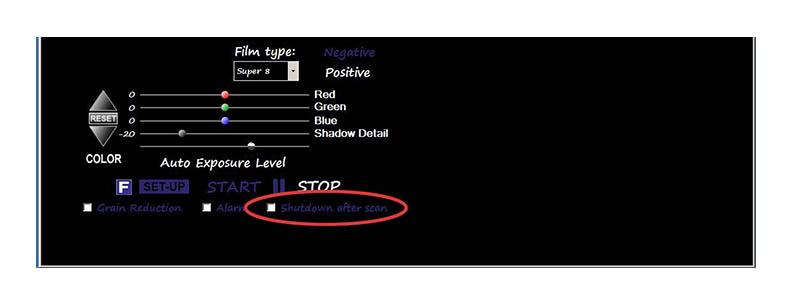
"Shutdown" will turn off the PC after the scan has completed or the unit stops. This is useful if starting a scan to run when you are away.
- BEGIN SCANNING -
Before you can scan any movie, you must create an album to put it in.
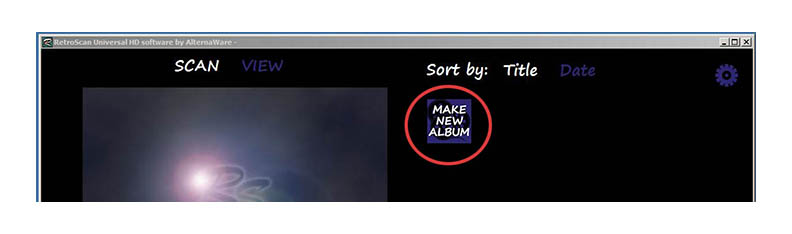
Click on the "Make New Album" icon.
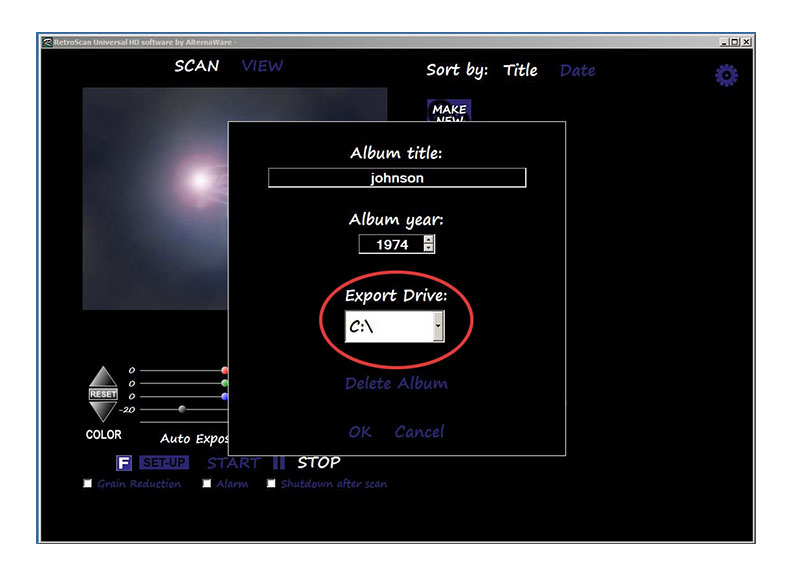
Fill out the necessary fields to create an album. While you can certainly create long file names, it is best to keep them short or even one word. The name of the album will be the prefix for all files created in that album and will number consecutively automatically, starting with "001". So, in the example shown above, the first file in the album will be "johnson_001". The next would be "johnson_002", etc. The default year is always 1974 but can be changed as desired. Filling in a year is not required and this information does not show up in the file name. It only appears in the album for reference, if needed. Album information can be changed later by right clicking on the album.
NOTE: The Export Drive for this album can be selected or changed here. If you have no other drives selected, it will say "Default", which is the default drive that you define in the Settings. Default is usually "C" but can be another drive if you designate it in the Settings. During export, you can plug in as many other destination drives as you have USB ports and each folder could export to its own drive, thereby keeping customer albums separated to different drives, if required. Or, all files can simply go to a common internal or external drive. Please note that this drive selection is for EXPORT ONLY. This will not affect the choice of drive to be used during the scanning process which should ideally be internal.
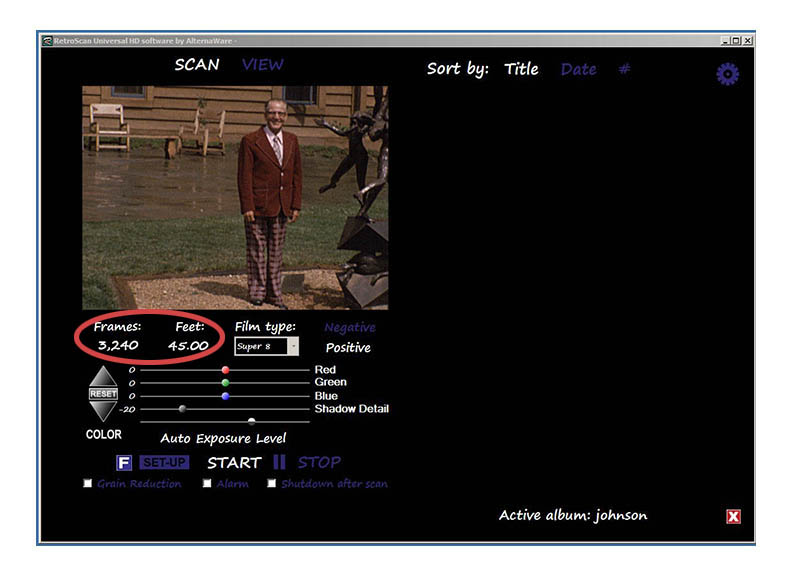
Once you create an album, double click to open it. With film loaded onto the Universal, perform your capture by switching the unit to "Forward" and then click "Start" on the software. While the film is scanning, you will see frames and feet displayed. Total footage will be included in the file information in the folder. This is handy if you are charging by the foot.

When you "Stop", a box will pop up that lets you change the name of the file, if you wish. You can add a date and a description, as well. In the upper right hand corner there is a tiny window with a scroll bar. This image will appear as the thumbnail for your file in the album. You can use the tiny scroll bar to find another frame to use for your thumbnail.

Once you close that box, the file will take its place in the album along with any other captures that you scan into that album.
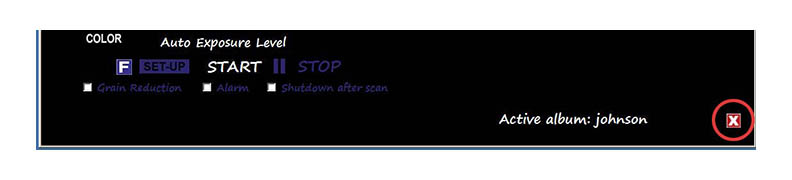
To close that album, just click on the X in the lower right hand corner.
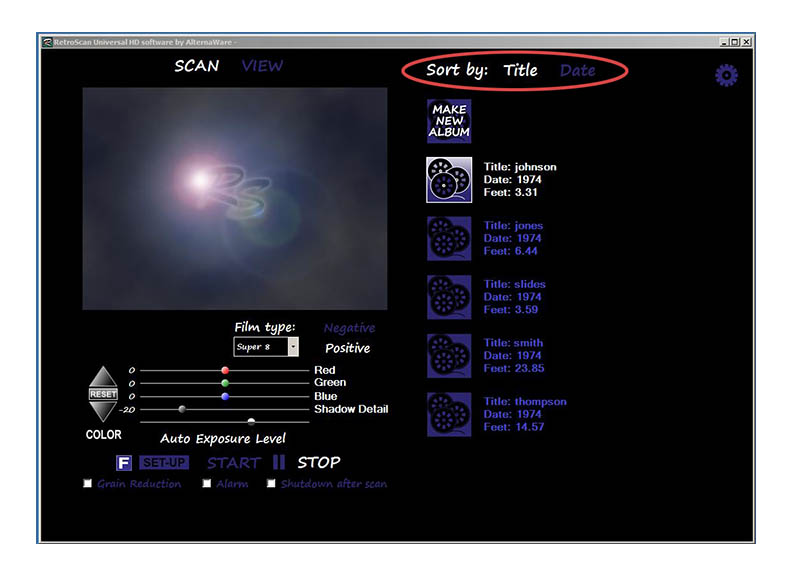
Albums will show up one above the other and can be sorted by title or date.
If you have any questions, please feel free to email at
retrofix@swtexas.net or call us at 830-966-4664.
Click HERE to go back.
Click HERE to go on to View/Export.
All information and imagery copyright 2016 MovieStuff, LLC
All right reserved.